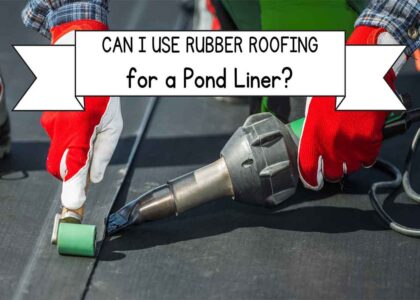
Creating a beautiful backyard pond starts with proper liner installation. This comprehensive guide will walk you through everything you need to know about installing an EPDM rubber pond liner, from initial planning to finishing touches.
Understanding Pond Liner Materials and Selection
Before beginning your pond project, it’s crucial to select the right materials. EPDM rubber pond liner has become the industry standard due to its durability and flexibility. The most common choice is 45 mil EPDM rubber pond liner, though thickness can vary based on your specific needs.
Types of Rubber Pond Liners
- EPDM rubber pond liner: The most popular choice, known for UV resistance and longevity
- Butyl rubber pond liner: Another high-quality option, slightly more expensive but extremely durable
- Firestone rubber pond liner: A trusted brand name in the industry
- Liquid rubber pond liner: Useful for repairs and special applications
Pre-Installation Planning and Site Preparation
Soil Testing and Ground Assessment
Before you begin excavation, proper soil testing is essential. This step helps ensure your pond’s long-term stability and prevents future issues. Key considerations include:
- Conducting soil permeability tests
- Checking for underground utilities
- Assessing natural drainage patterns
- Identifying potential problem areas
Ground Leveling and Base Preparation
Proper base preparation is crucial for a successful installation. The ground must be:
- Completely level and compact
- Free from rocks, roots, and debris
- Properly graded for desired depth
- Stable enough to support water weight
Essential Tools and Materials Checklist
Installation Tools Needed
- Measuring tape for accurate dimensioning
- Excavation equipment (shovel, mini-excavator if necessary)
- Level and string lines
- Utility knife for cutting liner
- Rubber mallet
- Wheelbarrow
- Garden rake
Materials Required
- EPDM or butyl rubber pond liner
- Protective underlayment materials
- Liner adhesive and sealant
- Edge finishing materials
- Substrate materials for base
- Drainage system components
Step-by-Step Installation Process
1. Measuring and Calculating Liner Size
Accurate measurements are crucial for success. To calculate liner size:
- Measure maximum length and width
- Account for depth at all points
- Add extra material for edges (minimum 2 feet on all sides)
- Consider shelf depths and contours
2. Excavation and Shelf Planning
Creating proper shelves and depth variations:
- Mark out the pond perimeter
- Excavate in layers, creating planting shelves
- Ensure proper depth for intended fish and plants
- Include shallow areas for marginal plants
3. Base Preparation Steps
- Remove all sharp objects and roots
- Compact the soil thoroughly
- Add sand layer if needed
- Install proper drainage where necessary
4. Underlayment Installation
Protective underlayment is crucial:
- Lay geotextile fabric smoothly
- Overlap seams properly
- Extend beyond planned liner edges
- Ensure no wrinkles or folds
5. Liner Positioning Techniques
Proper liner placement is critical:
- Center the liner over the excavation
- Allow material to naturally fall into place
- Work from center outward
- Minimize walking on liner during installation
6. Fold Management and Fitting
Managing folds requires patience:
- Create pleats in corners
- Minimize folds in visible areas
- Work systematically around the pond
- Allow liner to warm in sunlight for better flexibility
7. Edge Securing Methods
Proper edge finishing ensures longevity:
- Create stable edge overlap
- Use appropriate edging materials
- Secure firmly but allow for movement
- Incorporate waterfalls and features
Post-Installation Procedures
Water Filling Guidelines
- Fill slowly to allow liner settling
- Check for proper positioning
- Monitor for problems
- Adjust folds as needed
Leak Testing Procedures
Ensure water-tightness:
- Mark water levels
- Monitor for 24 hours
- Check for wet spots outside
- Verify edge sealing
Landscaping Integration
Finishing touches make the difference:
- Add decorative edging
- Install water features
- Position plants appropriately
- Create natural transitions
Maintenance Requirements
Regular Maintenance Tasks
- Inspect liner regularly
- Clean as needed
- Check for damage
- Maintain water levels
Long-term Care
- Monitor for UV damage
- Repair small tears promptly
- Maintain proper water chemistry
- Adjust edges seasonally
Troubleshooting Common Issues
Leak Detection and Repair
- Identify leak sources
- Use appropriate repair methods
- Monitor repair effectiveness
- Prevent future problems
Seasonal Considerations
- Prepare for winter
- Adjust for temperature changes
- Protect from ice damage
- Maintain during growing season
Safety Considerations
Always prioritize safety during installation:
- Use appropriate protective equipment
- Follow proper lifting techniques
- Ensure electrical safety
- Maintain stable working conditions
Conclusion
Installing a rubber pond liner requires careful planning and attention to detail, but the result is a beautiful and lasting water feature. Following these guidelines will help ensure your pond provides years of enjoyment with minimal maintenance needs.
Remember to consider local regulations and climate conditions when planning your pond project. For specific product recommendations or technical support, consult with local pond suppliers or professional installers.